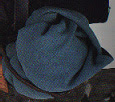
Rolling the Civil War Overcoat
For all you Federal Reenactors (and you curious Confederates) out there, you may be wondering "how the heck did the original US soldiers carry those overcoats?" of course, you may not care, especially if you don't have an overcoat. But for me, I wanted to know. A little digging turned up the information that the soldiers carried them rolled, and on top of their knapsacks. But, "how did they roll them?" you might pontificate. Well, I too pondered the same perplexity, and answers were not forthcoming. I could find no printed instructions left over from the war. I have since learned that there were a few reenactors out there who chose not to share this info, well, they have been punished. Fortunately, one of the studliest members of the 15th US/1st Fla modified the World War I overcoat rolling procedure and scored a breakthrough. So here are the steps for rolling the overcoat thanks to Matt Wright.
Step One
Lay the overcoat flat and button all the front buttons and the buttons on the cape. However, undo the buttons on the back belt and pull the belt parts out from under the coat. Fold in the sleeves so that they run along the length of the front opening. Next, pull the cape away from the rest of the coat and form a clam-shell with it (check the picture.) Make sure the cape is even both left and right and that the edges of the cape meet evenly away from the coat.
Step Two
Fold in the sides of the coat over the sleeves until they too run evenly along the front opening of the coat. Fold in the bottom of the coat a little more until it roughly has this shape \_/. It will make it easier to roll it tightly later.
Step Three
Roll the overcoat from the bottom towards the cape tightly and make sure it stays even on the sides. For some reason, this picture didn't come out too well, but the roll is about halfway, or right about where the back belt pieces come across. Once you get a good half-roll, put your knee on the roll to hold it in place.Step Four
While holding the roll with your knee, fold in the to corners of the 'clamshell' until they cross like in the picture. This step is crucial and you will undoubtedly have to unroll and repeat this step many times until you can get just the right
width to make a tight roll. The wing tips need to overlap, however, because they will eventually hold the roll in place. I didn't get a shot of what you do next, but you're smart you can figure it out. Fold the cape piece down (exactly as it is with that overlap) at the collar. You can see the collar line in the picture, it is right above the button. The cape will be facing the roll you are holding with your knee, with the opening in the cape towards said roll.
Step Five
Now, take the roll with one hand, and grab the top two layers of the cape with the other hand. Simply roll the coat up into the opening, pulling the cape with one hand and rolling with the other. Be careful not to pull out the crossed wings of the cape or you will have to start over. If you find that the roll isn't very tight, roll the coat out of the cape, cross the cape tips a little tighter and try it again.

 The photo on the left shows the finished coat. The one on the right is an original overcoat rolled up. Notice the similarity. Admittedly, I don't know if that coat has been rolled since the war, but other period photos I have seen show the same thing. Once you get the coat rolled, you can use it for a pillow, a football, and you can even carry it on your knapsack.


No comments:
Post a Comment
Comments welcome, but will be moderated.